Our team is highly trained and experienced in servicing and producing all types of steel supplies. Need help or have a question?
sales@abrasionresistantpipe.com
Tel.: +8621-3378-0199
Our team is highly trained and experienced in servicing and producing all types of steel supplies. Need help or have a question?
sales@abrasionresistantpipe.com
Tel.: +8621-3378-0199

Sunny steel has Stainless steel pipes for oil cracking inventory to fulfill your project’s needs, buy Stainless steel pipes for oil cracking at best price & fast delivery.
Sunny steel has Stainless steel pipes for oil cracking inventory to fulfill your project’s needs, buy Stainless steel pipes for oil cracking at best price & fast delivery.
The material of the stainless steel round bar is from Jiuli and Baosteel China, we control the quality from the very start.
Typically uses types 304, 316, 405, and 410. 304 is excellent between 260-399C (500-750F) while 400-series stainless steels offer resistance at higher ranges, up to 343-371C (650-700F.) 304 also provides excellent naphthenic acid corrosion resistance.
The following are some of the most common corrosive compounds encountered in the various processes employed across the oil and gas industry.
This puts stainless steel in a position that few other metals can match. While carbon steel is suitable for some low-temperature, -pressure, or -corrosion situations, the variety of stainless steel alloys available ensures there is an option to provide protection against even the most corrosive oil and gas refinement processes.
We polished three times to make sure the surface is perfect bright and smooth, and without any deficiency in quality.
We have precision equipment to test according to the standard required and PMI test to check the material before delivery.
We know that the stainless steel seamless pipe has a quality demanding for seamless pipe in the environment of high temperature and pressure.
The cracks on the pipe, as a result of improper machining operation process in the production process may roll or drawing die setting improper reasons, folded, Alice skin, scratches or strain, surface and internal defects. In order to ensure seamless pipe quality, according to the relevant technical standards for products, seamless steel pipe production line required nondestructive testing of surface and interior. Commonly used eddy current testing and magnetic flux leakage detection technology.
Eddy current testing is to establish a non-destructive detection method on the basis of the electromagnetic induction, it will sine current excitation probes coil, when the probe near the Seamless surface, an alternating magnetic field in the coil around the rims surface induced electromotive force generated induced current, i.e. a vortex. The snails and feelings generated magnetic field acting on the coil, thereby changing the electrical parameters of the coil.
The loss resistance of the vortex channel and the eddy-current generation of anti-flux, but also reflected to the probe coil, changing the size and phase of the current in the coil, which changes the impedance of the coil. The probe in the seamless steel surface is moved relative defects encountered, so that the reaction of the eddy current magnetic field of the coil, causing the change of coil impedance, thereby measuring the amount of change identified seamless steel pipe surface defects.
Stainless steel seamless pipe has a high requirement on quality in the environment of high temperature and pressure. Improper machining operation process in the production process may roll or drawing die setting improper reasons and on the pipe, as a result of a crack. Folding, warping, scratches, or strain, surface and internal defects. In order to ensure seamless pipe quality, according to the relevant technical standards for products, seamless steel pipe production line required nondestructive testing of surface and interior. Commonly used eddy current testing and magnetic flux leakage detection technology.
Eddy current testing is to establish a non-destructive detection method, on the basis of the electromagnetic induction it sine current excitation probe coil, the induced electromotive force generated when the probe near the Seamless surface, the alternating magnetic field around the coil rims surface generates an induction current, i.e. vortex. The vortex is also the feelings generated magnetic field acting on the coil, thereby changing the electrical parameters of the coil. The loss resistance of the vortex channel and the eddy-current generation of anti-flux, but also reflected to the probe coil, changing the size and phase of the current in the coil, which changes the impedance of the coil. The probe in the seamless steel surface is moved relative defects encountered, so that the reaction of the eddy current magnetic field of the coil, causing the change of coil impedance, thereby measuring the amount of change identified seamless steel pipe surface defects.
| Item | ASTM A213/A213M | ASTM A312/A312M | ||
|---|---|---|---|---|
| Grade | TP304 | TP304L | TP304 | TP304L |
| TP316 | TP316L | TP316 | TP316L | |
| TP317 | TP317L | TP317 | TP317L | |
| TP347 | TP310S | TP347 | TP310S | |
| TP309H* | TP310H* | TP317* | TP310H* | |
| TP321HΔ | TP321HΔ | |||
| Grade | C (max) | Si (max) | Mn (max) | P (max) | S (max) | Ni | Cr |
|---|---|---|---|---|---|---|---|
| TP 304 | 0.08 | 0.75 | 2 | 0.04 | 0.03 | 8-11 | 18-20 |
| TP 304H | 0.04-0.10 | 0.75 | 2 | 0.04 | 0.03 | 8-11 | 18-20 |
| TP 304L | 0.035 | 0.75 | 2 | 0.04 | 0.03 | 8-13 | 18-20 |
| TP 309S | 0.08 | 0.75 | 2 | 0.04 | 0.03 | 8-13 | 18-20 |
| TP 310S | 0.08 | 0.75 | 2 | 0.045 | 0.03 | 12-15 | 22-24 |
| TP 316 | 0.08 | 0.75 | 2 | 0.04 | 0.03 | 19-22 | 24-26 |
| TP 316L | 0.035 | 0.75 | 2 | 0.04 | 0.03 | 10-15 | 16-18 |
| TP 316Ti | 0.08 | 0.75 | 2 | 0.04 | 0.03 | 11-14 | 16-18 |
| TP 317 | 0.08 | 0.75 | 2 | 0.04 | 0.03 | 11-14 | 16-18 |
| TP 321 | 0.08 | 0.75 | 2 | 0.04 | 0.03 | 9-13 | 18-20 |
| TP 321H | 0.04-0.10 | 0.75 | 2 | 0.04 | 0.03 | 9-13 | 17-20 |
| TP 347 | 0.08 | 0.75 | 2 | 0.04 | 0.03 | 9-13 | 17-20 |
| TP 347H | 0.04-0.10 | 0.75 | 2 | 0.04 | 0.03 | 9-13 | 17-20 |
| Grade | Tensile Strength Min(Mpa) | Yeild Point Min(Mpa) | EL. Min(%) | Rockwell Max |
|---|---|---|---|---|
| TP 304 | 515 | 205 | 35 | 90 |
| TP 304H | 550 | 240 | 35 | 90 |
| TP 304L | 485 | 170 | 35 | 90 |
| TP 309S | 515 | 205 | 35 | 90 |
| TP 310S | 515 | 205 | 35 | 90 |
| TP 316 | 515 | 205 | 35 | 90 |
| TP 316L | 485 | 170 | 35 | 90 |
| TP 316Ti | 515 | 205 | 35 | 90 |
| TP 317 | 515 | 205 | 35 | 90 |
| TP 321 | 515 | 205 | 35 | 90 |
| TP 321H | 515 | 205 | 35 | 90 |
| TP 347 | 515 | 205 | 35 | 90 |
| TP 347H | 515 | 205 | 35 | 90 |
Heat treatment technology of stainless steel pipe surface
For the heat treatment technology of the surface of stainless steel pipes, non-oxidation continuous heat treatment furnaces with protective gas are generally used abroad for intermediate heat treatment and final heat treatment of finished products. As a bright surface without oxidation can be obtained, the traditional pickling process is eliminated. The adoption of this heat treatment process not only improves the surface of stainless steel pipes, but also overcomes the environmental pollution caused by pickling.
According to the manufacturer of stainless steel pipes, according to the current world development trend, bright annealing continuous heat treatment furnaces are basically divided into the following two types:
(1) Roller-type bright annealing heat treatment furnace.
This bright annealing furnace type is suitable for heat treatment of large-size and large-volume special-shaped stainless steel pipes, with an hourly output of above 1.0 Tons. The protective gases that can be used are high-purity hydrogen, decomposed ammonia and other protective gases. It can be equipped with a convection cooling system to cool the special-shaped stainless steel tube faster.
(2) Mesh belt type bright annealing heat treatment furnace.
This bright annealing furnace type is suitable for small-diameter thin-walled precision special-shaped stainless steel pipes. The hourly output is about 0.3 to 1.0 Tons. The length of the steel pipe can be up to 40m. It can also be used to process capillary tubes in coils. Equipped with convection cooling system for fast cooling. Using gas fuel or electric heating, various protective gases can be used. The stainless steel pipe after this furnace-type heat treatment has no scratches and good brightness surface.
Tensile test and hardness test of stainless steel pipe?
Tensile strength test is to make a sample of stainless steel pipe, pull the sample to break on a tensile testing machine, and then measure one or several mechanical properties, usually only the tensile strength, yield strength, elongation after fracture and section are measured Shrinkage. Tensile strength test is the most basic test method for mechanical properties of metal materials. Almost all metal materials require tensile test as long as they have requirements for mechanical properties. Especially for those materials whose shape is not convenient for hardness test, tensile strength test becomes the only means of testing mechanical properties.
The hardness test is to slowly press a hard indenter into the surface of the sample with a durometer under specified conditions, and then test the depth or size of the indentation to determine the hardness of the material. Hardness test is the simplest, fastest and easiest method in material mechanical property test. The hardness test is non-destructive, and there is an approximate conversion relationship between the material hardness value and the tensile strength value. The hardness value of the material can be converted into the tensile strength value, which has great practical significance.
Because the tensile strength test is not easy to test, and it is convenient to convert the hardness to the strength, more and more people only test the hardness of the material and less test its strength. In particular, due to the continuous advancement of hardness tester manufacturing technology and innovations, it is now possible to directly test the hardness of some materials that could not be directly tested before, such as stainless steel tube, stainless steel sheet and stainless steel strip. Therefore, there is a tendency for hardness tests to gradually replace tensile tests.
Our specialized process for seamless tubing manufacturing begins with either an extruded hollow tube or a solid bar drilled to our exacting specifications. The material is then reduced in size a number of times through various cold working techniques until it reaches the specific size, tolerances, and temper required by our customer. After each cold working cycle the tubes are cut, cleaned and heat treated in preparation for the next cold working step.
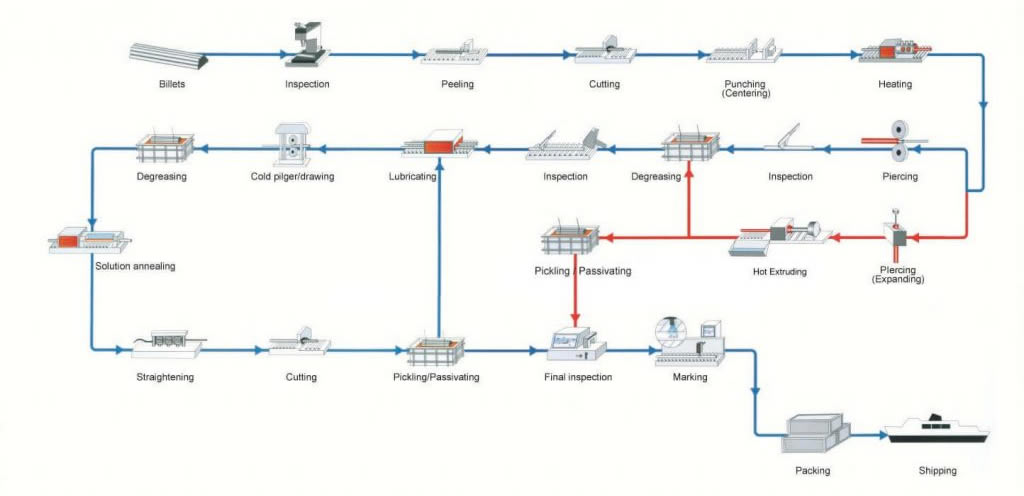
Pilfering
Pilfering reduces the size of the tube across three dimensions – outside diameter (OD), internal diameter (ID) and wall thickness. We roll a die set with a tapered groove across the outside of the tube while supporting the inside diameter using a taper-matched, hardened steel mandrel.
In a single cold working step, we can achieve a significant reduction in cross-sectional area while minimizing material loss and, most importantly, improving the material’s microstructure. Seamless tubes constitute the majority of volume processed by tube reducing or pilgering.
Cold Rolling
Like pilgering, tube rolling also uses compression to reduce the size of seamless tubes. However, while pilgering uses a pair of grooved, tapered dies to work the metal over a tapered mandrel, tube rolling utilizes one or two sets of rolls with constant cross-section grooves on the circumference of the tube.
Generally, the process employs a cylindrical mandrel with little or no taper. The rolls are driven by rack and pinion gears of different radii along profiled cams, completing multiple 360º rotations around the tube.
Cold rolling is a very precise method of reducing very thin walled and/or smaller diameter tubes, and is often used as the final cold working step. By rolling, we’re able to achieve exceptional control over dimensional tolerances and surface finish while also minimizing material loss and improving the metal’s microstructure.
Because it uses compression, tube rolling is well suited to processing unique metals like titanium and zirconium alloys.
Our cold rolling capabilities include both classic 2-roll (single roll set) tube rollers and an advanced 3-roll approach.
Cold Drawing
Typically used as the first form of size reduction for seamless tubes, cold drawing reduces the diameter by pulling the tube through a die that is smaller than the tube. In order to fit the tube into the die, one end is ‘swaged’ or ‘tagged’ thereby reducing the diameter of the leading end before drawing. Next, the narrowed end is passed through the die and clamped to a drawing trolley which pulls the tube through the die. After drawing the ‘tag’ is cropped from the tube end prior to cleaning.
Sink drawing
This is the simplest of the three drawing methods, as there is no tooling to support the ID surface. The tube is drawn through a die made of polished tool steel or industrial diamond, thereby reducing its inside and outside diameters. Our specialized lubrication and application techniques, combined with our proprietary die profiles, enable the OD surface to become smoother as the tube is drawn. Since the inside diameter is not constrained, the wall thickness of the tube will normally increase during drawing, and the ID surface finish will normally become rougher during a sink draw.
Rod drawing
Rod drawing is our most commonly used cold draw method, primarily for intermediate or in-process drawing stages, where both the outside diameter and wall thickness are reduced at the same time.
The tube is loaded over a hardened steel mandrel rod and both are then drawn through a die. This squeezes the tube onto the rod, reducing the outside diameter and thinning the wall simultaneously. The die and mandrel determine the size of the drawn tube, which is then slightly expanded by applying pressure to the outside of the tube so that the rod can be removed. Since larger reductions in cross-sectional area can be achieved by rod drawing, this method is used for mid-process stages to reduce tube sizes prior to the final drawing cycle.
Plug drawing
This type of drawing is used to achieve the best possible surface finish and the greatest control over both dimensions and final temper. The outside diameter and wall thickness of the tube are both reduced during plug drawing, as the tube travels through a die and over a stationary plug/mandrel made of high grade tool steel. The plug or mandrel has a polished surface and is attached to a fixed back rod, which is carefully positioned within the drawing die. The tube is loaded over the mandrel/back rod. As the tube passes through the die, the burnishing action of the metal flowing over the stationary plug imparts a high tolerance surface finish inside the tube.
When properly lubricated and prepared, the ID will show very few flaws and finishes of 16 RMS or better can be achieved. Plug drawing is normally chosen for the final draw stage because it achieves a high quality surface finish, exceptional dimensional control, and positive influence on tensile strength requirements.
Annealing
Annealing is used to soften the metal before further cold working or fabrication processes, and improves the overall metallurgical microstructure of the tube. During tube reduction or cold drawing, it can become hard and somewhat brittle. To be able to draw the tube again, stresses formed during cold working need to be removed to return the material to its normal state.
During annealing the tube is heated to a controlled temperature (up to 2100°F) and soak time. Through this process the tube remains in shape, but the grains in the structure of the tube reform into a regular unstressed pattern. The resulting annealed tube is softer and suitable for redrawing.
Our closely controlled annealing and heat treat processes are audited regularly by our nuclear, medical, and aerospace customers.
Straightening
Drawing and annealing generally results in some degree of bowing, producing a slight bend in the tubing. We use multiple roll mechanical straighteners in the first stage of finishing. The straightener applies pressure and flex to the product in order to remove bends or bows, resulting in a straightness level of 0.010” per foot, or better. Straightening can introduce slight changes to the size and mechanical properties of the tubing, so these aspects are very carefully controlled during the process.
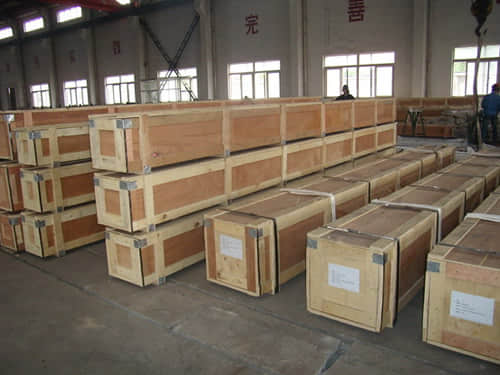
There are probably hundreds of different methods for packing stainless pipe, and most of them have merit, but there are two principles that are vital for any method to work prevent rusting and Sea transportation security.
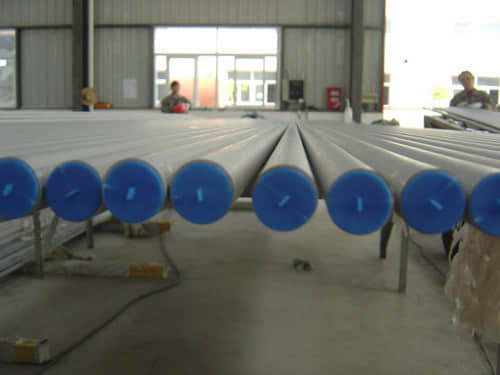
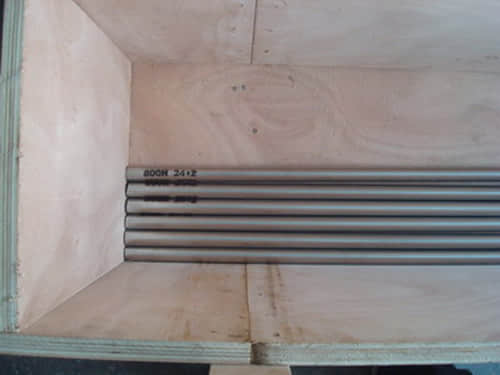
We inventory stainless steel grades that are readily used in manufacturing such as 304, 304L and 316/L to harder to find items such as 309H, 330 or 405 stainless.
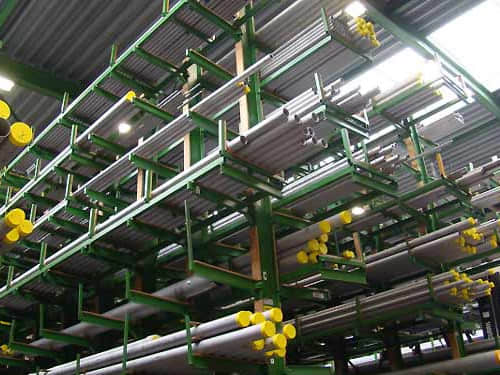
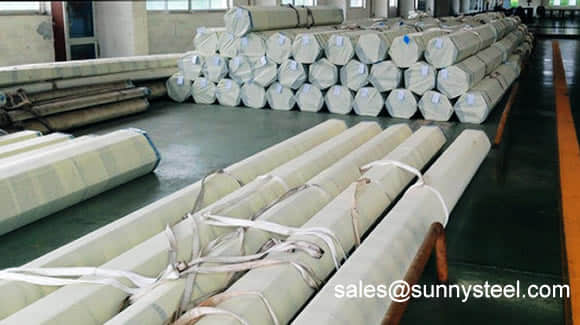
Stainless steel pipe (tube) has excellent characteristics of corrosion resistance and smooth finishing. Stainless steel pipe (tube) is commonly used in demanding equipment like automobiles, food processing, water treatment facilities, oil and gas processing, refinery and petrochemicals, breweries and energy industries.
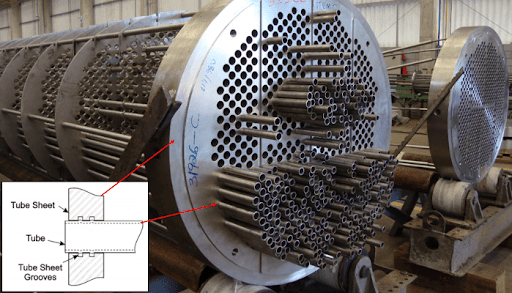
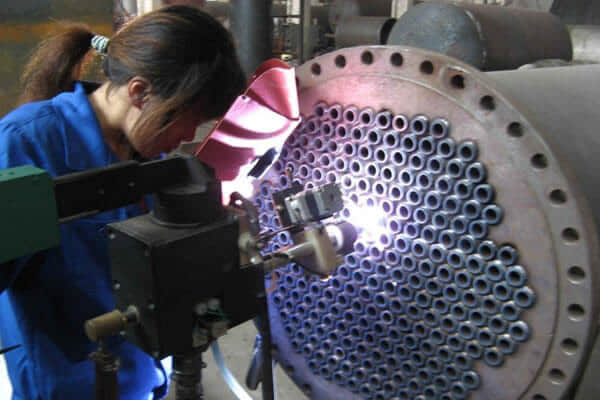
Stainless steel tube is typically measured by its outer diameter and can be used in a variety of applications including a number of structural applications. Stainless steel tubing is extremely durable and able to withstand corrosion. This tubing will not rust, even if exposed to the elements, heat, and other extreme conditions. Because of these factors, stainless steel tubing can be used for a wide variety of applications.
The stainless steel tubing that is supplied by SunnySteel can used in a variety of industries, including:
Considering the importance of outside and inside surface of stainless steel tubes for fluid power industry, Our mills are providing tubes that are free from scale, rust, seams, laps.
the main requirement for stainless steels is that they should be corrosion resistant for a specified application or environment. The selection of a particular “type” and “grade” of stainless steel must initially meet the corrosion resistance requirements.
Additional mechanical or physical properties may also need to be considered to achieve the overall service performance requirements.
Need to inquire about our products? Fill out the form below and our staff will be in touch!
Q: How long is your delivery time?
A: The delivery time of customized products is generally 25 35 days, and non customized products are generally shipped within 24 hours after payment.
Q: Do you provide samples? Is it free?
A: If the value of the sample is low, we will provide it for free, but the freight needs to be paid by the customer. But for some high value samples, we need to charge a fee.
Q: What are your payment terms?
A: T/T 30% as the deposit,The balance payment is paid in full before shipment
Q: What is the packaging and transportation form?
A: Non steaming wooden box and iron frame packaging. Special packaging is available according to customer needs. The transportation is mainly by sea.
Q: What is your minimum order quantity?
A: There is no minimum order quantity requirement. Customized products are tailor made according to the drawings provided by the customer.